

By clicking the [ T ] button of a red box a window will open. In that space you will have the possibility to upload and modify the image of the box or you can upload an album straight from the photo gallery.
If you wish to upload in the box an entire album, visit the “How to insert an album” page.
To upload an image click “Add image” and go to the images’ gallery.
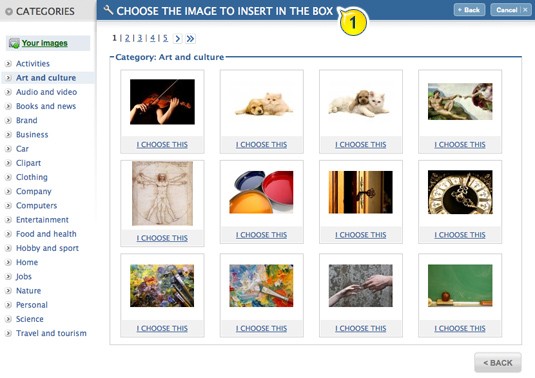
1. To use an image from the gallery, select one of the categories, browse it and then click on “I select this” button located below the image you’ve chosen.
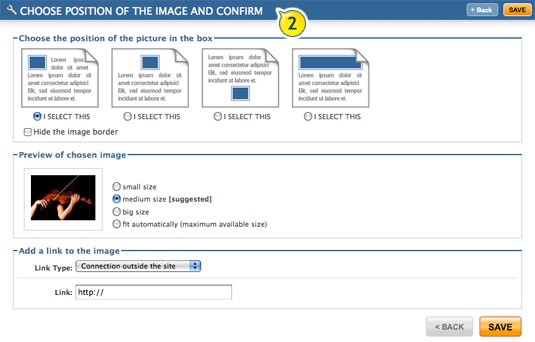
2. Then select the position of the image in the box, the size (we recommend medium) and then create a link to the image, if you want to.
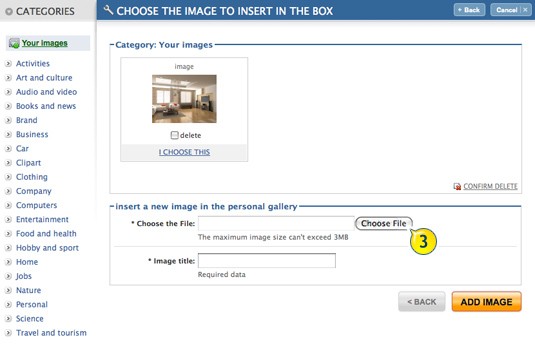
3. To insert a personal photo in the box, click on the “Add image” button and then press “Your images”.
To insert a new image in your personal gallery, you have to click on “Browse” and select the file directly from your pc.
After naming the photo and pressing “Insert image”, it will be loaded and you will see it with all the others images you uploaded.
Press “I select this” and select the settings (position, size, link) to complete the insertion of the image in the box.
If you load a personal image, the weight of the photo should not exceed 15 Mb.
To cancel the images, select them from the window and press “Confirm cancellation”.
When you enter in an editing red box window in which an image is present, you’ll find two different links instead of the “Add pictures” button: Change Picture (which brings you to your gallery) and Change Options (to modify position, dimensions and link).
